Why your home’s insulation probably isn’t as good as you think it is.
Richard Keech
2023-08-18 (updated 2024-07-23)
Having assessed many hundreds of homes in Victoria, both new and old, I’ve come to the conclusion that when someone buys a new house in Australia they nearly always aren’t getting what they pay for when it comes to insulation. From what I’ve seen, the typical new-build home in Victoria has less than half the effective level of insulation that they are supposed to have.
Common standard practice, when it comes to insulation, seems to have a large element of going through the motions, i.e., not taking it seriously.
The fundamental problems seem to be:
- Insulatability. The homes often have structures that make it hard, or even impossible, to insulate properly;
- Failure to deal with allowable gaps. There are allowed levels of gaps in insulation, i.e., a percentage of the ceiling area uninsulated. These gaps have to be allowed for and insulation thickness needs to be increased to offset the impact of gaps. This doesn’t always happen;
- Damage to insulation by following trades;
- Missing insulation;
- Failure to check and make good.
Coverage matters
When it comes to insulation, coverage is critical, i.e., any gaps in insulation have an out-sized, negative impact on thermal performance. A common rule of thumb is that a 5% gap in coverage corresponds to a 50% reduction in performance of a ceiling. This is apparent from a table in the National Construction Code (NCC) – shown below. My view is that ‘5%/50%’ rule of thumb is an understatement of the impact of gaps.
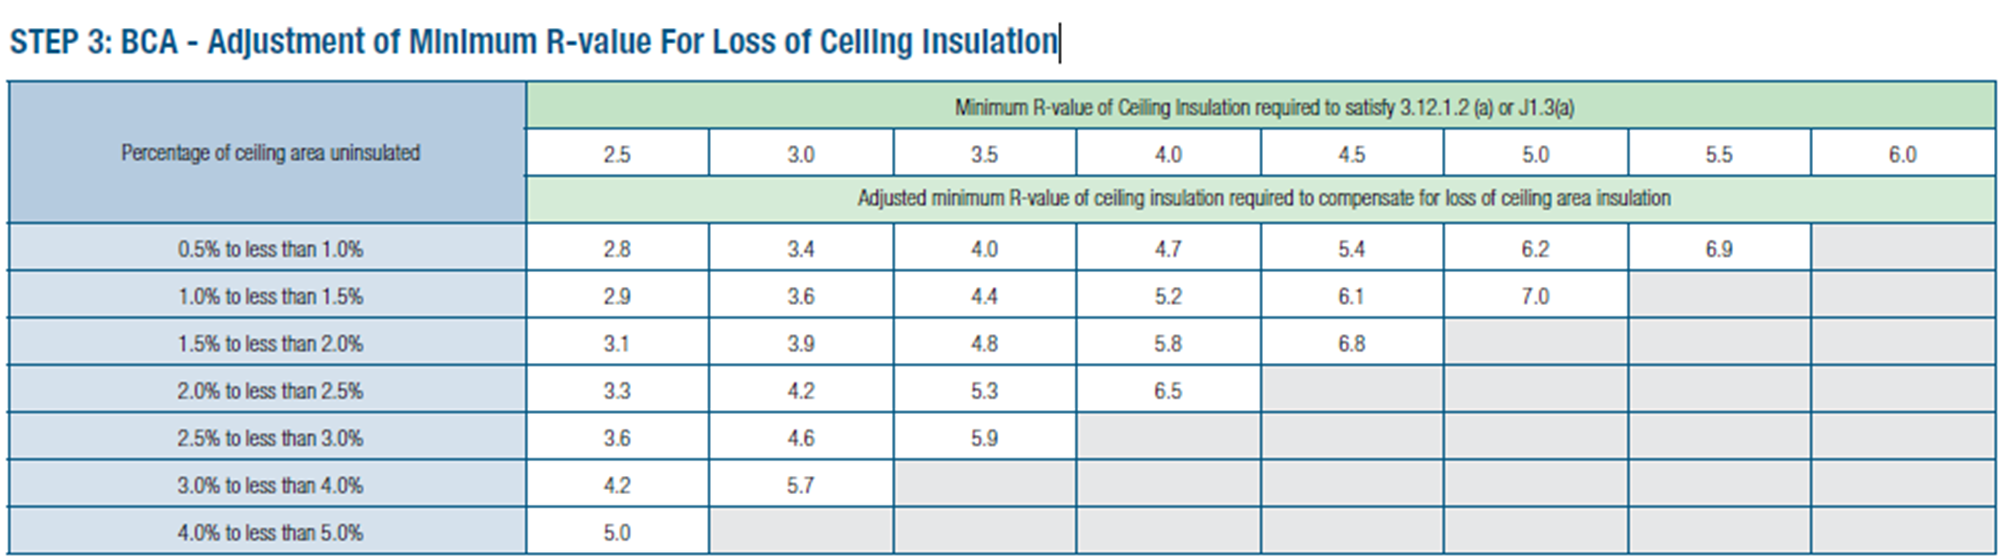
This table is intended to inform building designers/builders how they need to adjust the thickness of insulation to account for gaps. For example, in this table, if R2.5 effective insulation is required, and there is 5% of total area uncovered, then R5.0 insulation material is required. However, if R5.5 (effective) is required, then the most uncovered area permitted is 1%, and R6.9 material is required.
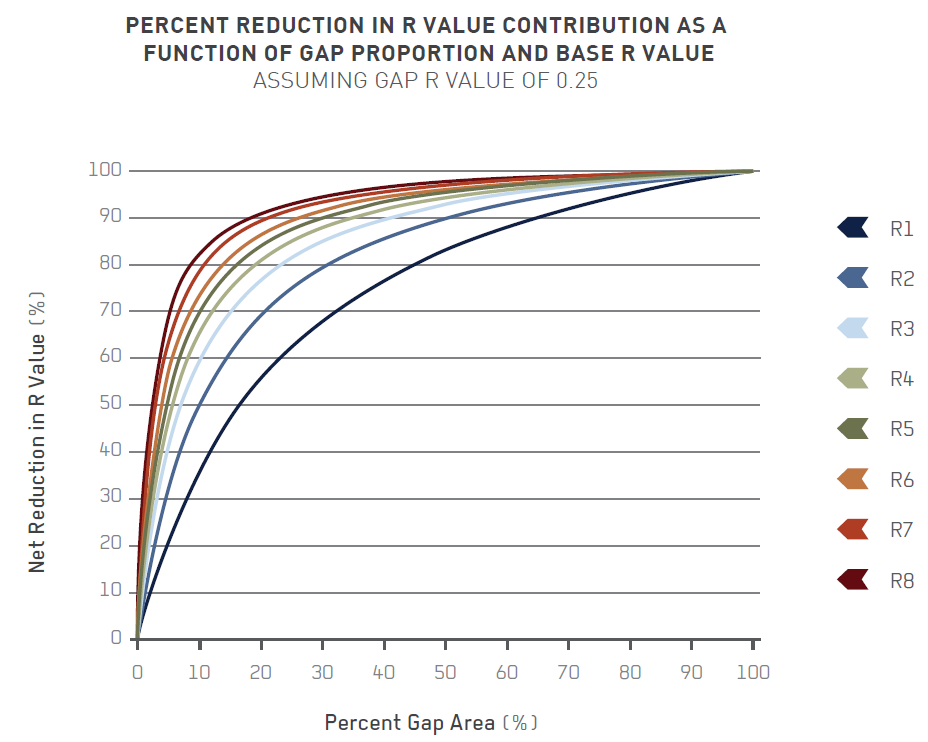
My point about the 5%/50% rule being an understatement of the situation is shown by the chart below. It shows clearly that the higher the R value, the greater the impact of gaps in insulation.
Roof issues
I commonly find that roofs have less than one half of the minimum required level of effective insulation (new builds), and one quarter of the minimum (older homes).
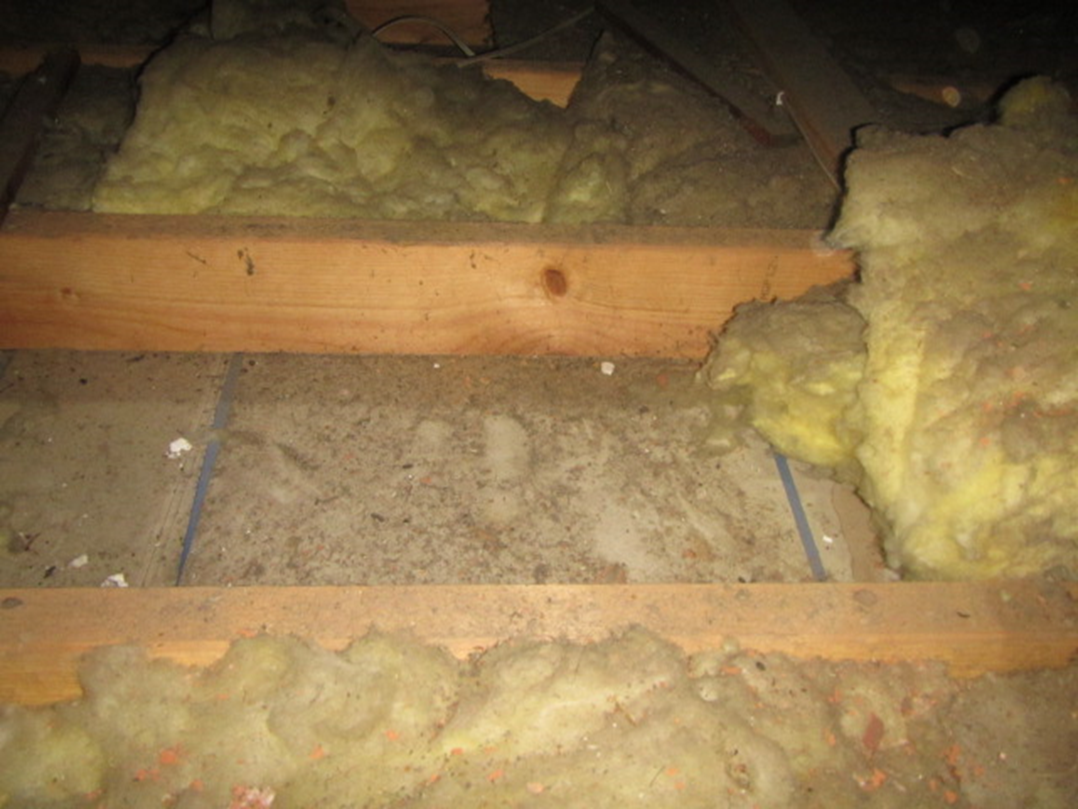
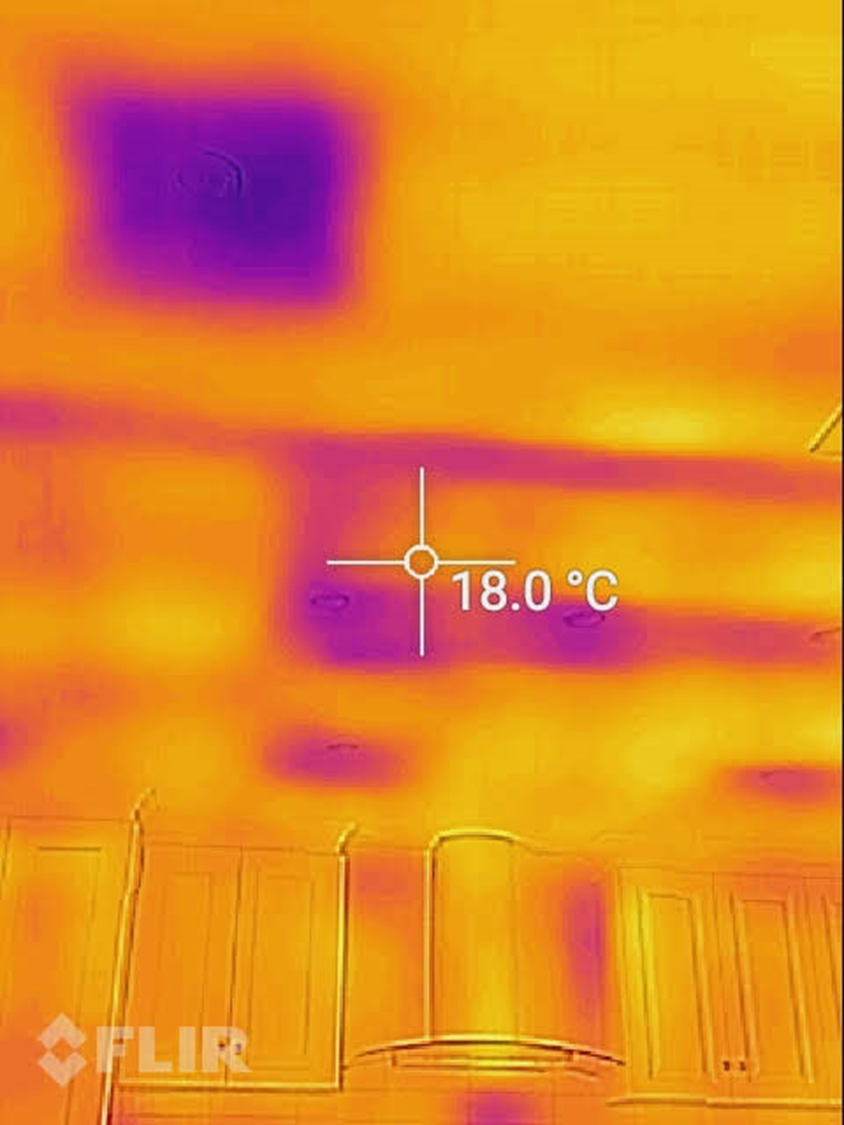
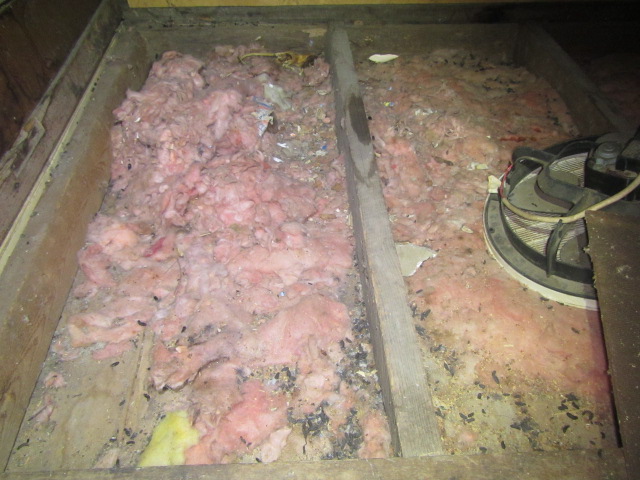
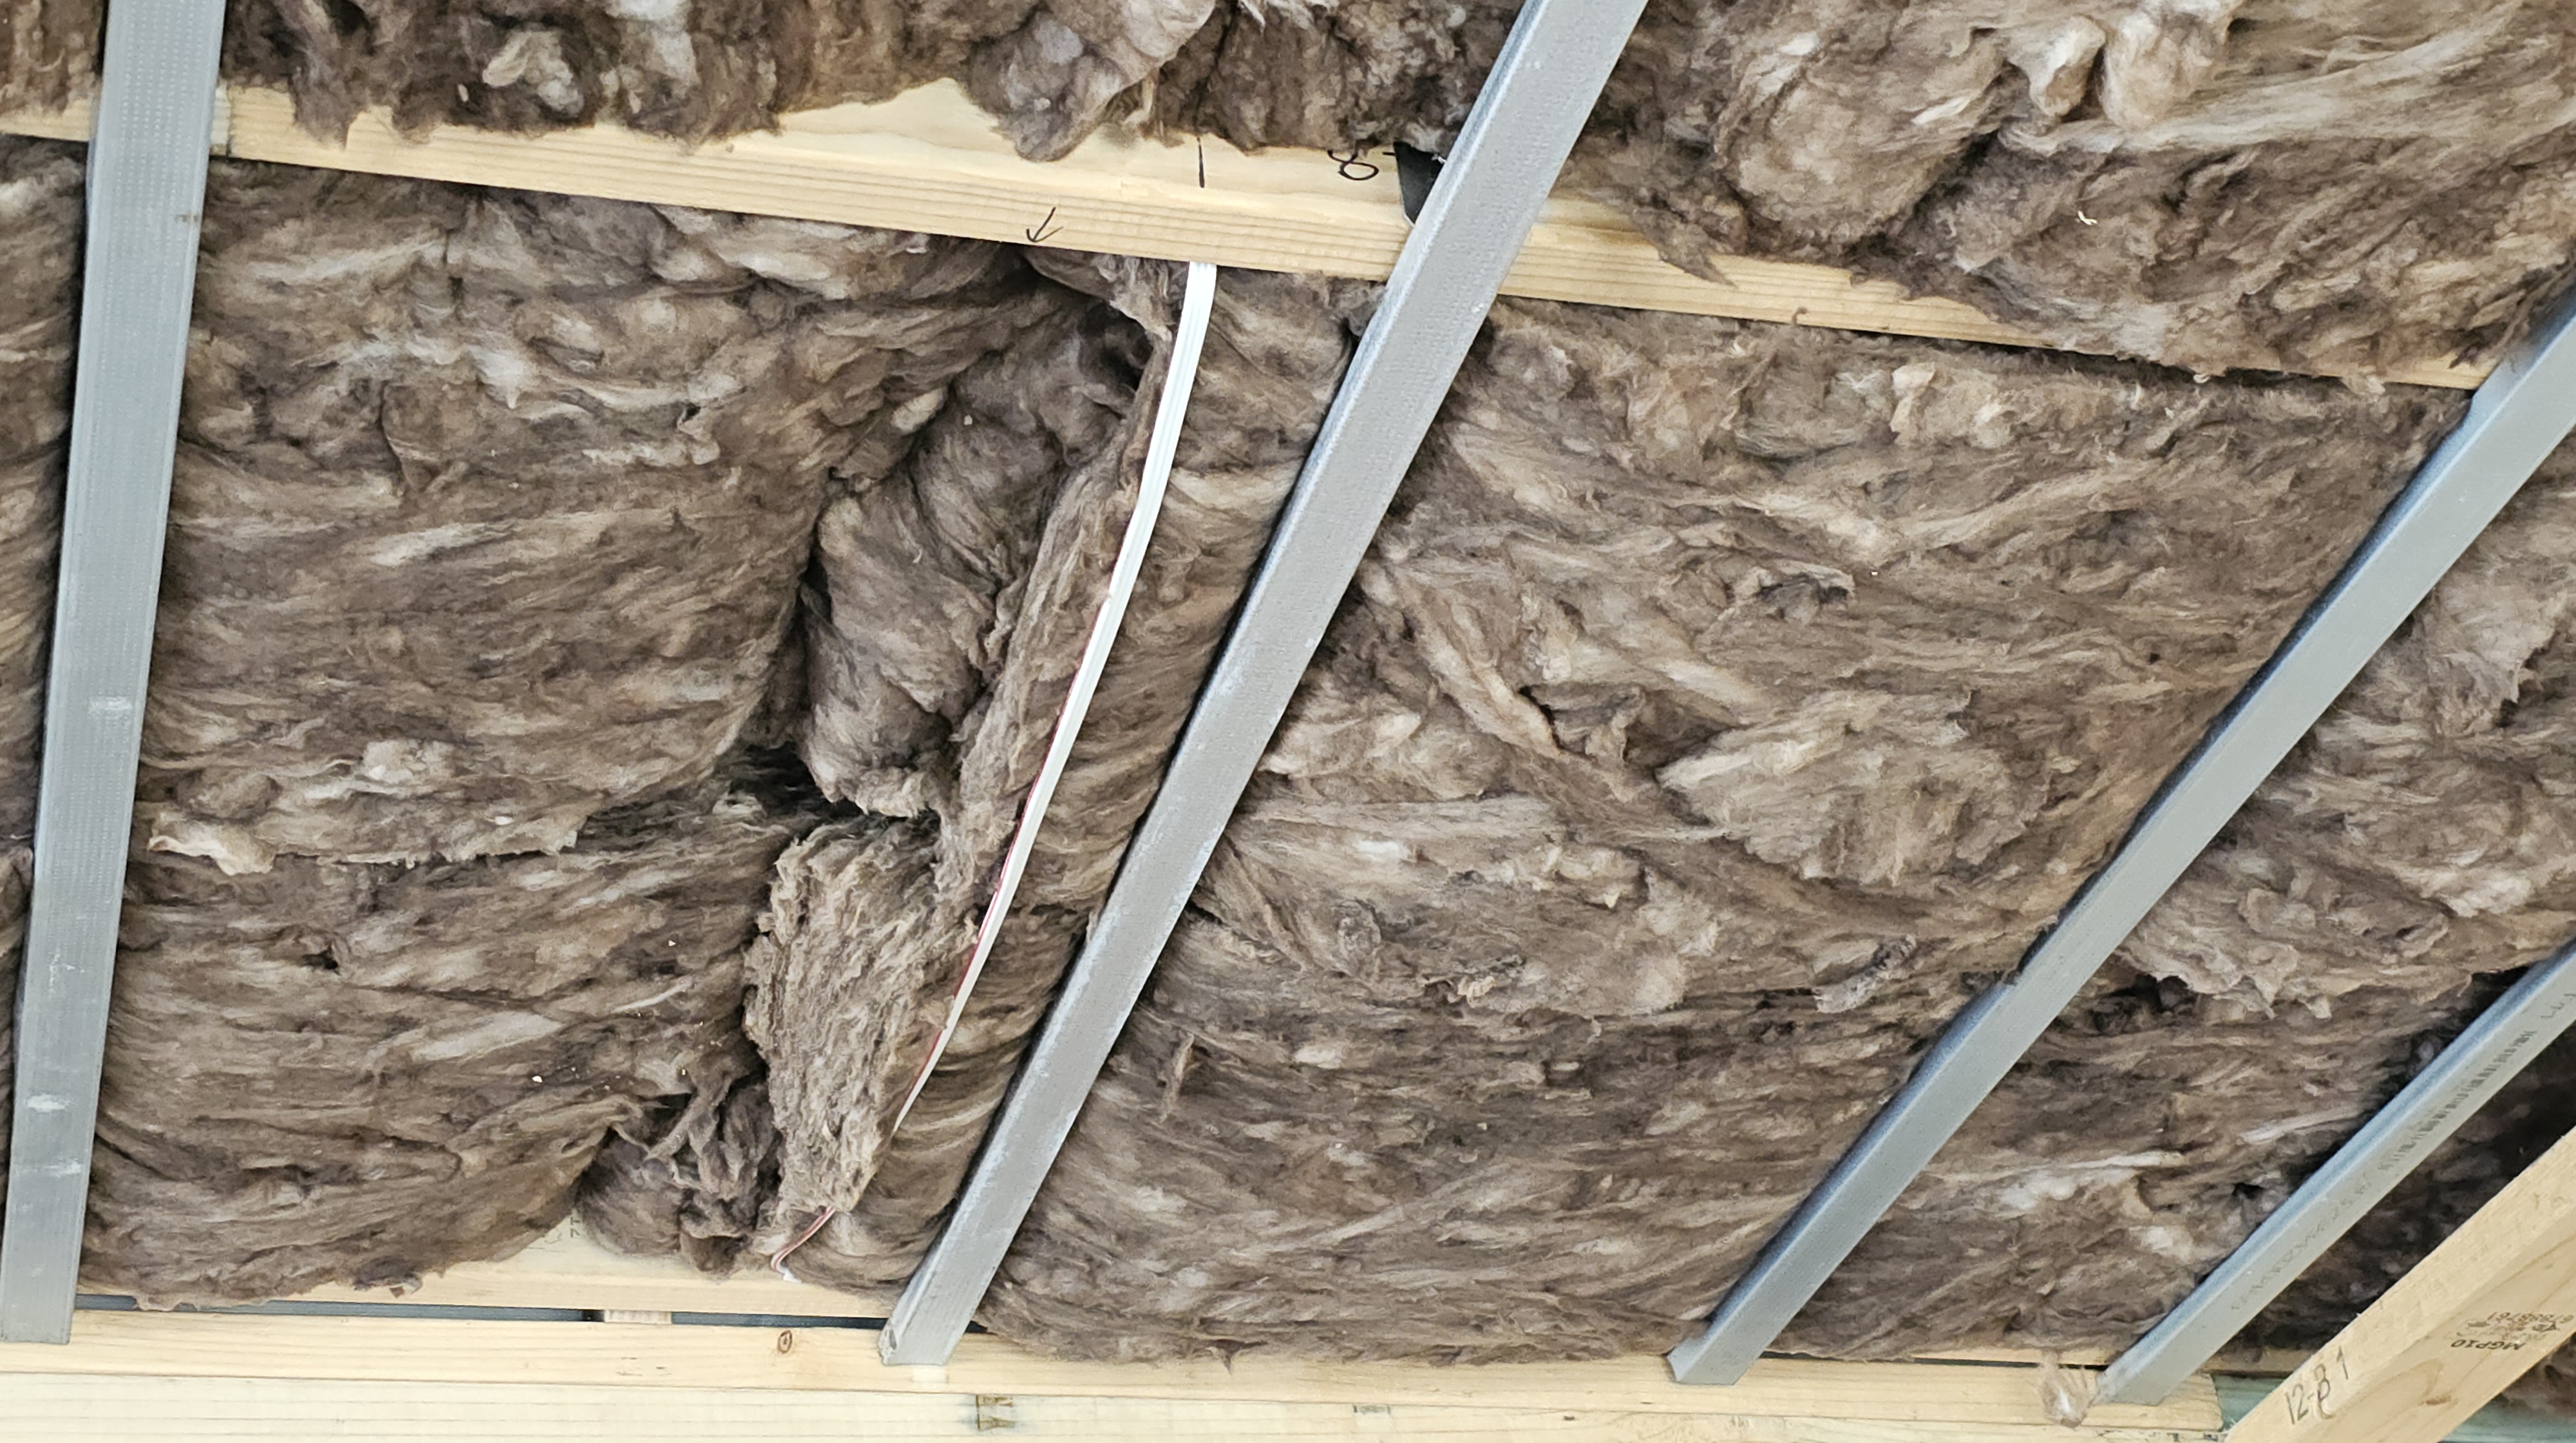
Gaps and missing insulation
It is very common to see sections of ceiling with no insulation where batts have been removed to make way for downlights, duct registers, or other structure.

Fixing these gaps is often very easily done by carefully replacing batts, cutting or shaping them as required.
Downlights. The situation with insulation around downlights is similar and discussed separately here.
Vermin damage
Vermin can rip, burrow and compress insulation material. Glass/mineral fibre seems more vulnerable than polyester. In my experience, this is more common to see in rural areas, and less in urban areas.
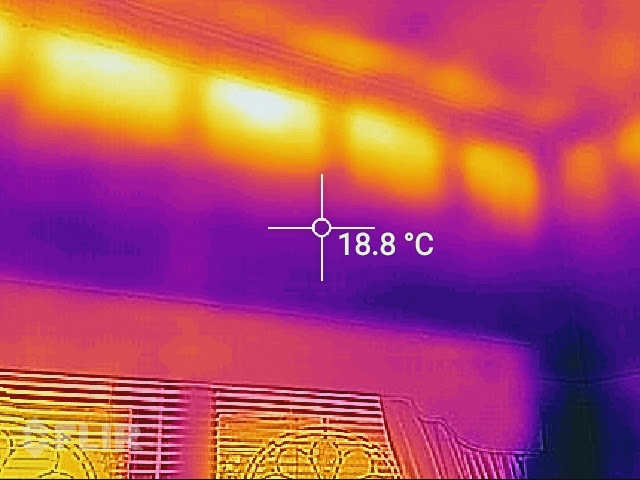
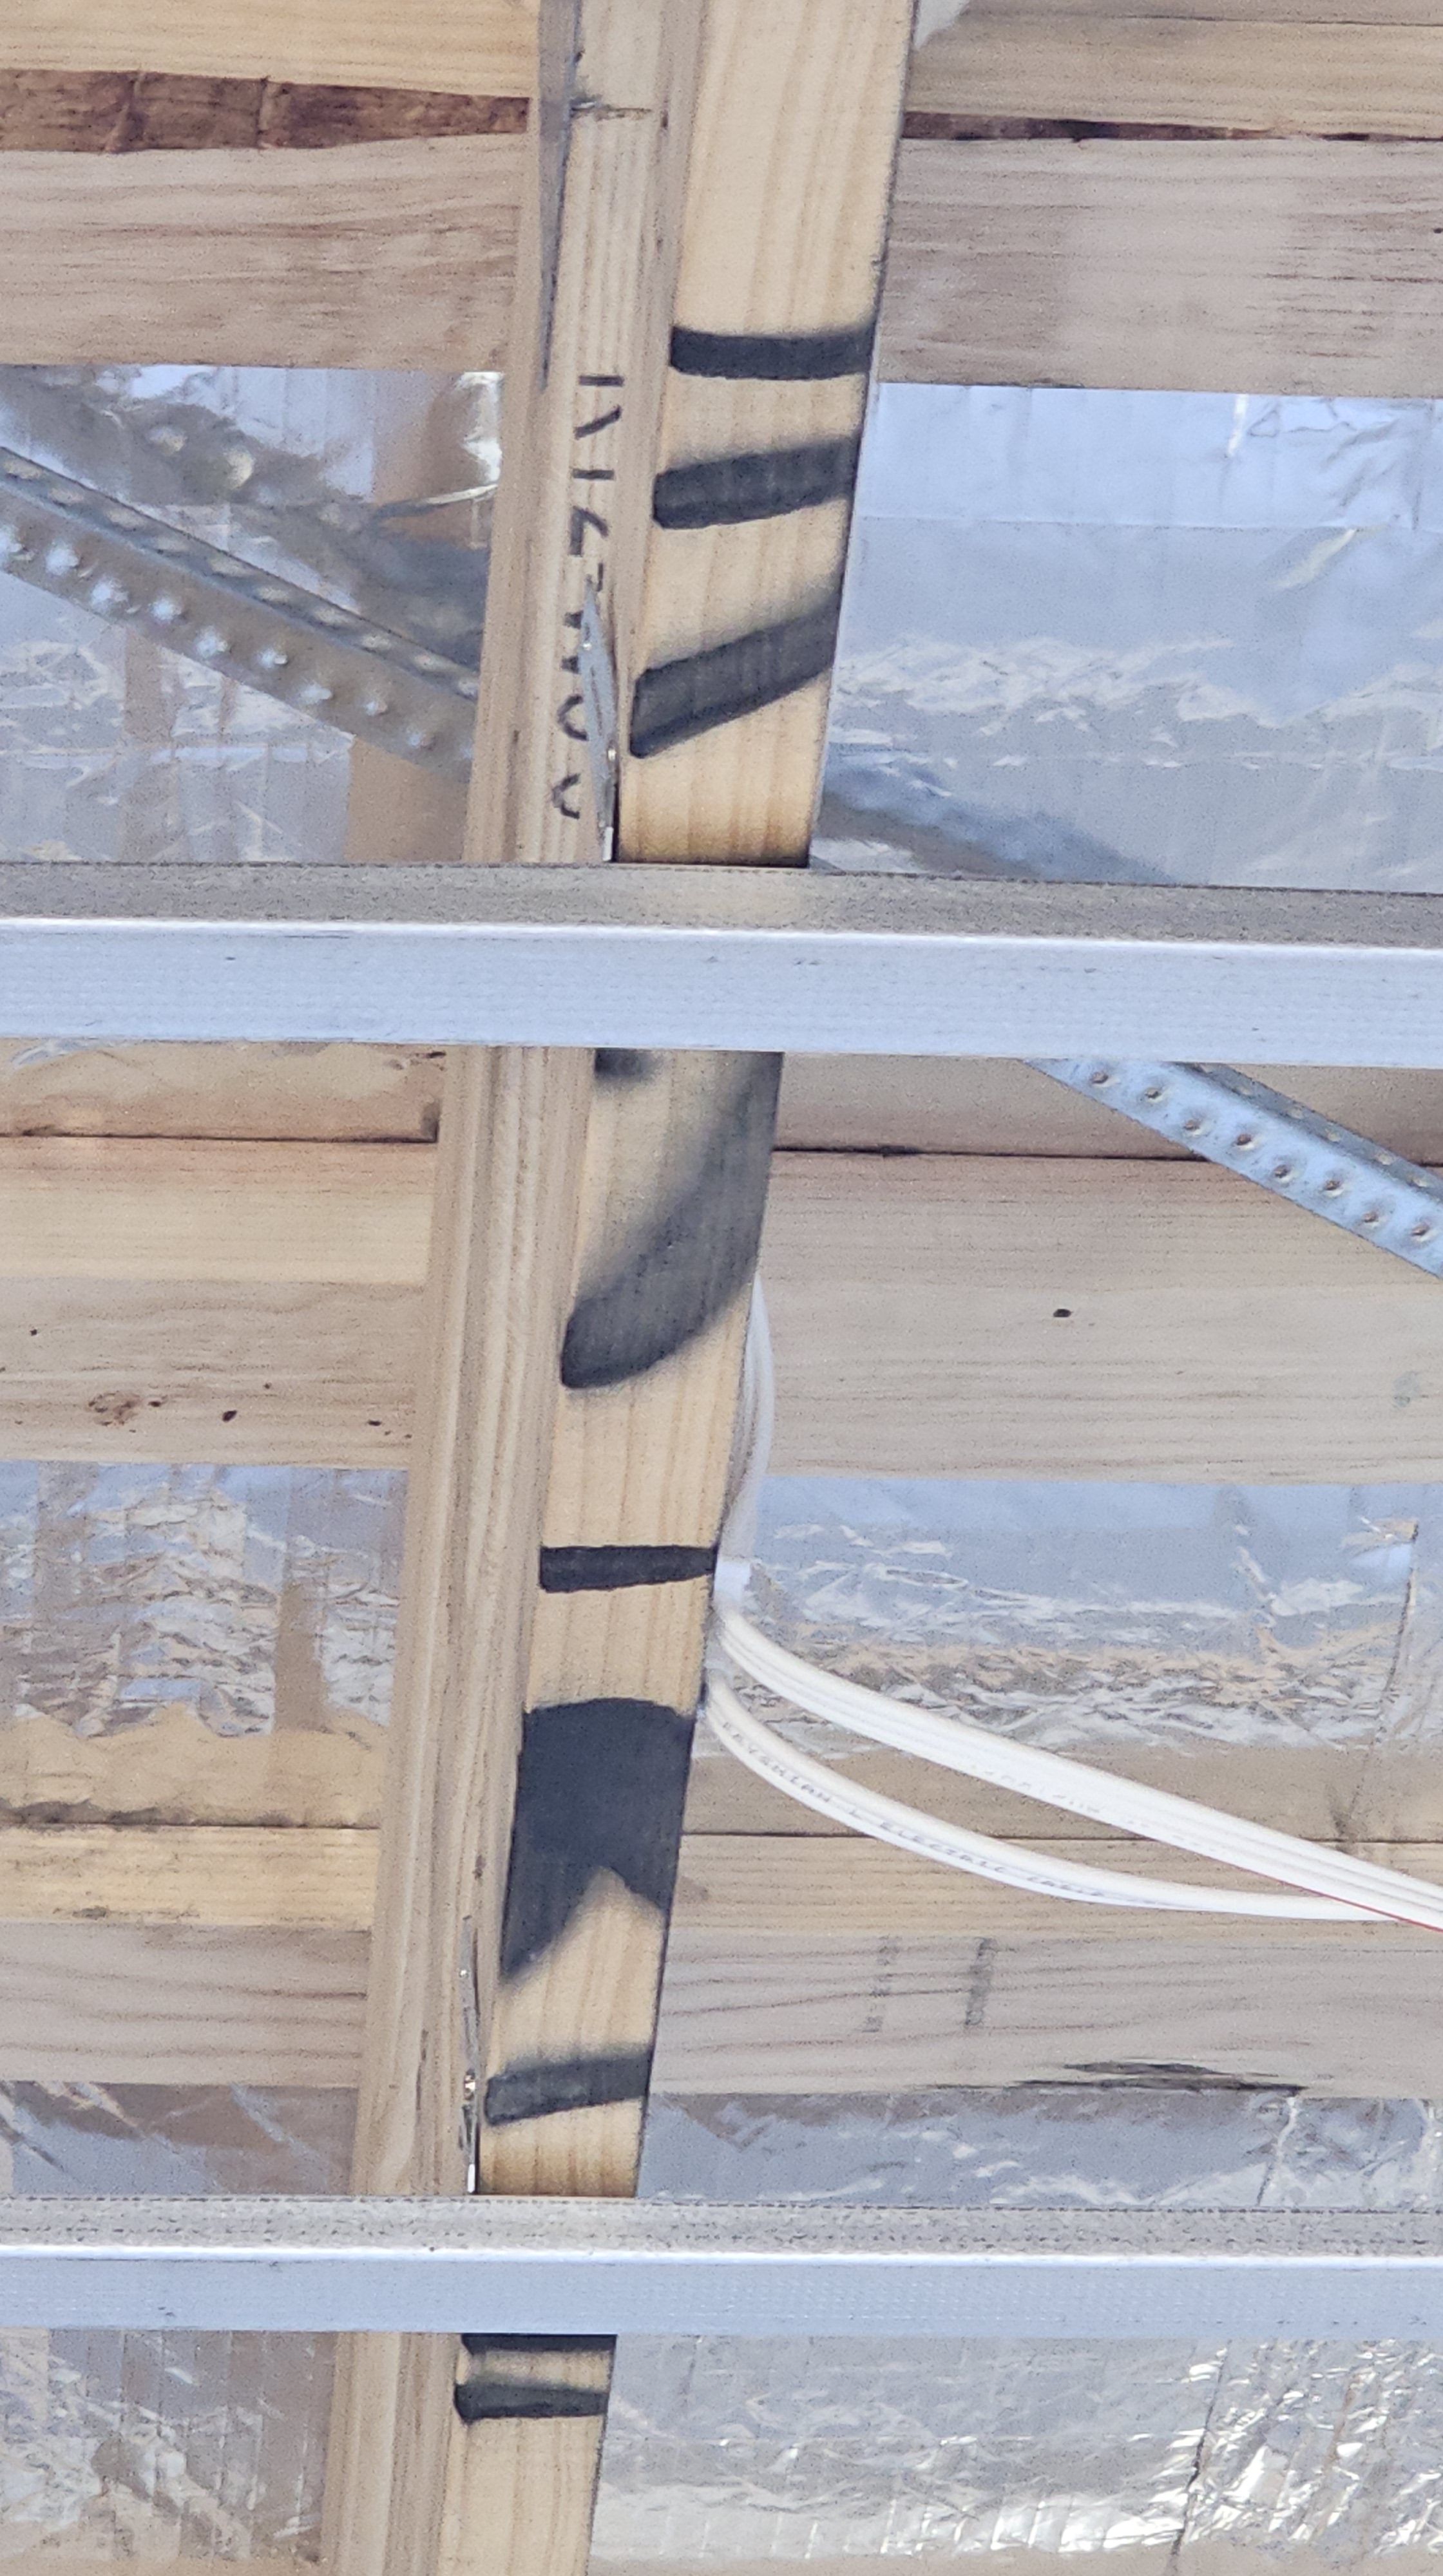
Thermal bridges
Sometimes roof structures include steel beams which have an impact on thermal performance. Sometimes this shows up clearly in thermal images.
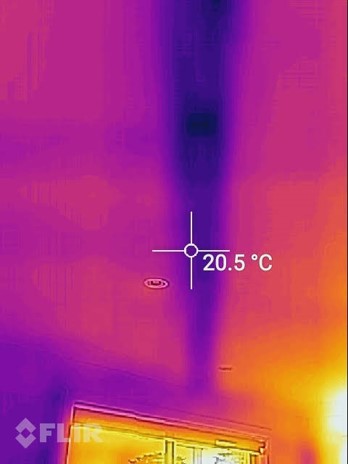
In principle, issues like this should be accounted for in the design and avoided. In the example in the figure above, this could have been dealt with by ensuring the ceiling plasterboard was not fitted against the beam. A 25mm layer of XPS insulation, under the beam, would probably have been sufficient to mitigate the problem.
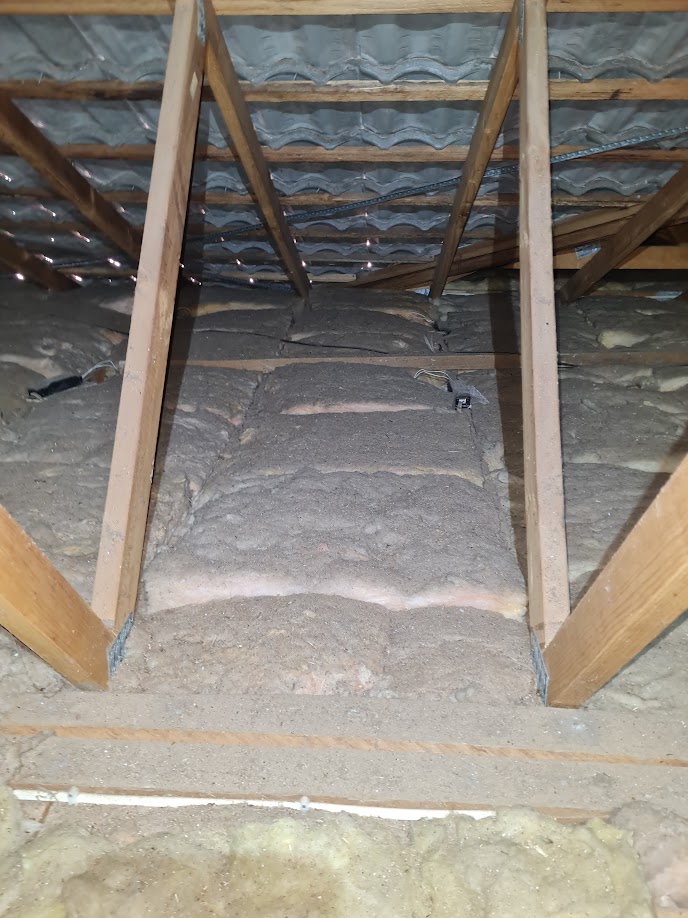
Trusses
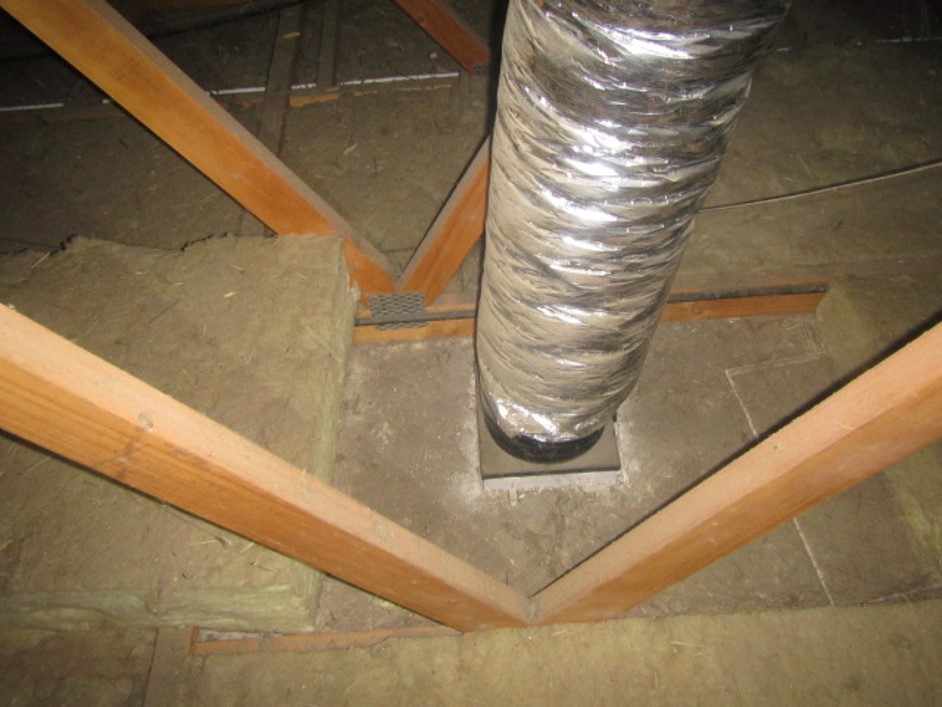
Contemporary homes typically have a shallow pitched roof with little or no eave, built with a truss structure. A typical truss has very little room at the tapered end to fit enough insulation. A good level of insulation would be R5. There needs to be at least ~250mm vertical clearance above the top plate of the wall to fit R5 insulation properly. In practice this rarely happens. The results that I see is often that the insulation is extended toward the top plate, but a gap is left around the perimeter. This might often be about 350mm- to 400mm-wide, as shown in the figure at the top of this article.
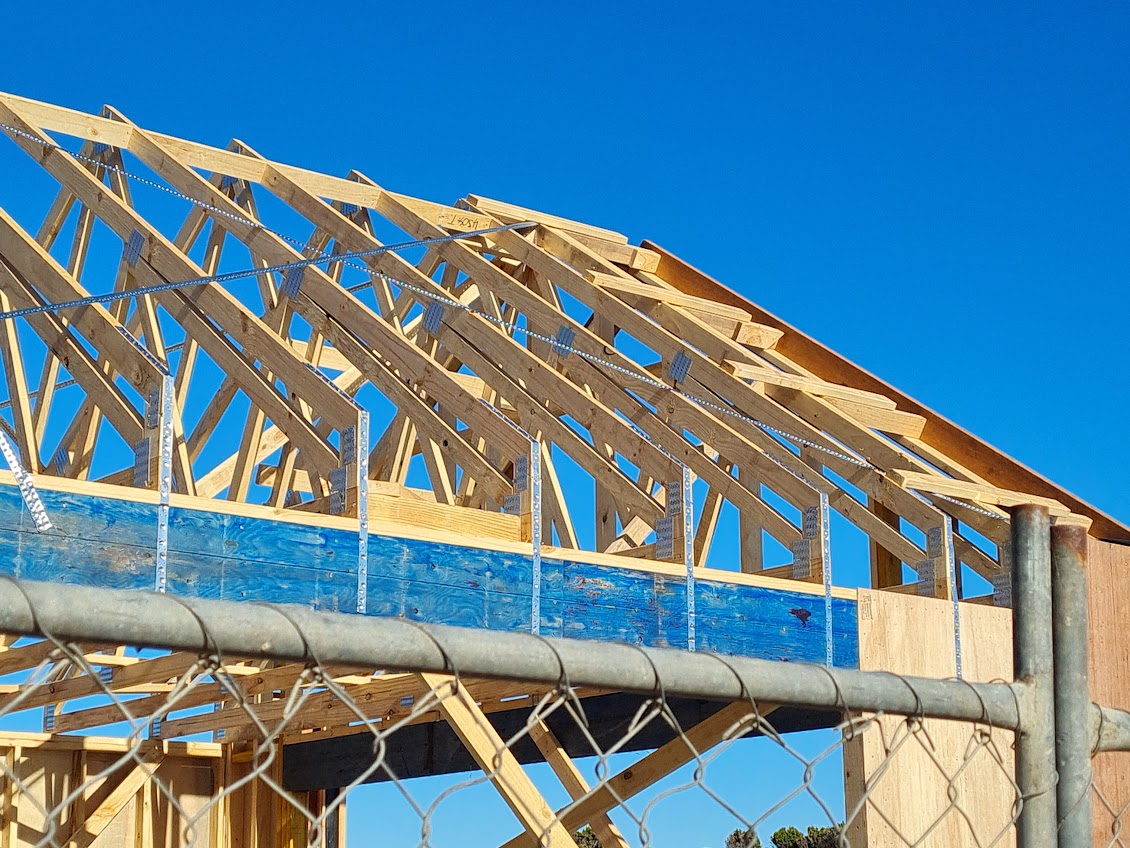
In a new build, the best way to make your roof able to be insulated is to specify ‘raised-heel’ trusses, also known as ‘energy’ trusses. An example is shown below.
Even without a raised-heel truss, it should be possible to make good existing roofs where there is a gap around the perimeter of insulation by getting the insulation re-laid, where necessary using thinner insulation right out to the top plate of the wall.
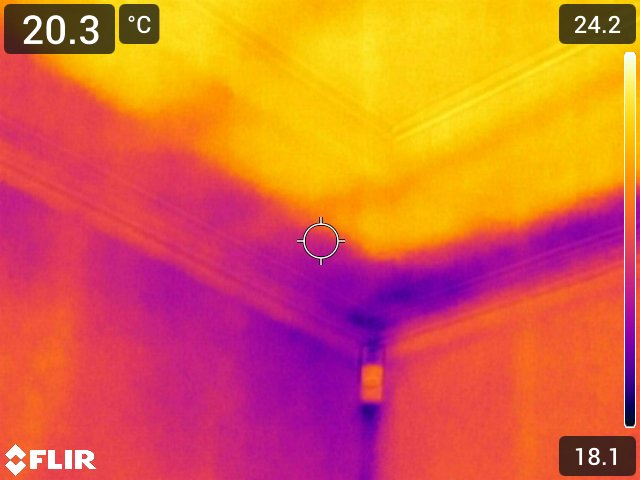
Upper walls
Another common problem I see, on homes with eaves, relates to the upper sections of walls which adjoin into the eave cavity. This is because the exterior walls are shorter than the interior walls. This leaves a horizontal strip ~300mm tall below the ceiling which is uninsulated.

If your home is like this, and you have roof tiles, then some insulation might readily be fitted by removing tiles to gain access. In any case, consult a good insulation contractor to help you make good the insulation shortfall.
Ventillated interfloor
One of the assumptions made when building a two-storey home is that the inter-floor structure (that makes the ground-floor ceiling and the floor of the upper level) is fully internal to the thermal envelope. Therefore it doesn’t need insulation. However, the way homes are built often allows external air to pass into the interfloor structure via perimeter penetrations, especially above garages, but also via ventilated walls.
Furring channels
A common way to fasten the plaster ceiling to the underside of the roof truss is to use aluminium furring channels. These might be used because the truss spacing is so broad that fastening direct to the truss would risk sagging plaster. However, the fitting of the furring channels underneath and at right angles to the trusses makes for a ceiling surface that makes it impossible for insulation to avoid having air gaps between the face of the batts and the plaster. This seems like a classic example of unintended consequences, arising from the measures taken to minimise the number of trusses used.
This problem is at its worst when:
- there is an inaccessible roof void as a result of a skillion roof;
- there are many downlights; and
- the truss is steel.

Going for good
Attending to insulation can make a huge difference to thermal performance. Much of this can be done DiY, so long as safe good practice is followed. Refer to the ICANZ Insulation Handbook Part 2 here. This guide is useful for both DiY, as well as helping you understand what is reasonable when dealing with professional installers. Note that the guide is updated from time to time, so check for the latest version.
For most homes I see, a two-step process is called for:
- (high priority) make good the existing insulation to achieve a complete and uniform based layer. Often this cannot be done properly till the downlights are replaced. Often, most or all of this can be done using existing mis-laid insulation material already in the ceiling;
- (lower priority) add another layer of (new) insulation to bring the total insulation up to a good standard. R5 is a good level to achieve. This would normally be about 200mm to 220mm thick. As a guide, existing roof joists are normally 90mm high, so decent insulation should be at least double the thickness of the joists.
Cross hatching? Some people advocate that the second layer of insulation be laid at 90 degrees to the the base layer for best performance. My view is that doing this makes the roof less safe to move in, because the joists end up being covered. So, for the sake of safety, I recommend laying new batts straight over the existing, such that the gap between adjacent batts shows where the joist is.